_%5BT+Eng1.10%5D_00000.png)

Fittingly enough when Faris left the party she was in her Dancer outfit, and still is in this scene. You'd think Bartz would be used to it by now, she's nearly mastered it. Anyway, Krile the walking talking plot device gets a 'feeling' from 'Galuf' from beyond the grave, saying to leave Tycoon. Reina wouldn't want to leave, and Bartz can't get through the dancing people to reach Faris, so he and Krile head off.


Don't fret townsperson, I'm sure the sky looking strange means nothing at all. Absolutely nothing at all. Also, I finally found my way into the tower on the right! There's 2 Cabins in there, and you have to walk through the castle wall. Like that makes any sense, but free treasure is free treasure. While looking around for this passageway I spoke to Faris' teacher, who reminisced about what a sweet little girl she was. Of course, the scene also shows how nice of an older sister she was to Reina. I suggest watching this scene if you haven't already-words won't do it justice.
Heading west across the bridge, Bartz and Krile find Boco and Koko, and ride Boco all the way up to Tule-and promptly fall in a pit shortly after.


They're attacked by the Antlion, a boss that can be a huge annoyance but isn't really threatening due to having access to Sonic Wave-which halves the level of the target. Despite Bartz getting hit with this once, the Water Scrolls still did a solid 1000 damage and finished the fight within a dozen rounds.


Don't ask why I had him as a Thief here, I truthfully don't know myself. Anyway, Faris rescues the duo with a rope, and Krile gets a totally not plot relevant splinter. Totally. Heading a bit farther south to Guido's Cave, he gives us backstory on THE VOID, Enuo, and the 12 Legendary Weapons. Reina even says something despite not being there!


And oh wait the splinter WAS plot relevant because Exdeath disguised himself as it. He took control over some of the power of THE VOID and used it to suck Tycoon into it. Oh no, Reina was still in the castle-and that poor lady outside was onto something! Then Guido fights Exdeath to a standstill, making a desperate bid to pass Galuf in the best old guy department. he is 700 years old after all. However, Galuf won his duel, and Guido just makes Exdeath mad enough to send them all to the Ancient Library.


The 2 halves of the Sealed Book are combined, and it speaks to the Light Warriors. It spoke of many things, 12 Legendary Weapons once used to defeat Enuo, 4 lithographs to break the seals, and their guardians and rewards-Leviathan, Bahamut, Flare, Holy, Meteo. In the remnants of the Forest of Moore, the party resolves to stop Exdeath to prevent more innocent lives from being lost: counting Reina among the dead. The Sand Tides in the desert had stopped, allowing quick and easy access to the pyramid. But before we could enter, there was a miniboss to take down.


The Gargoyles both must be defeated at the same time, or the surviving one revives the other at full HP. Titan and Scrolls split the damage very nicely. The undead enemies in the pyramid made Faris less useful, as 50% of her attacks would lower her HP or MP! I switched her to a Thief, recovering Dash and Find Passages-but unfortunately this meant I HAD to use the Bone Mail!


The sliding animation amused me. Throughout the pyramid there were trapped sections that dropped undead snake enemies if you took too long or stepped on certain tiles. These were really annoying, especially when Team Sidequest went for specific monster-trapped chests. I retrieved a White Robe, Black Robe and Black Garb, the latter of which let me unequip the Bone Mail. I know it has by far the best defense in the game, but I really don't like being unable to heal. Maybe when I get to Berserkers only...


On a Preemptive strike I could depelte the 10k HP an Archaesaur has before it could move. Machine Heads got the same treatment, always.


Mummies died before they could act as well, getting wrecked by Fire Scrolls and Titan jsut like Archaesaur. The miniboss Sekmet encounter attacked twice, but posed no threat. The brother he's referring to might pose a bit more threat, but I know how to deal with it already. I did wipe to Level 3 Flare in this dungeon once due to forgetting to equip Escape, but thankfully I lost very little progress. You can never have too many safety saves. On the 8th floor I picked up another Gold Hairpin, Protect Ring and Ribbon, none of which I equipped. They're all useful at various points though, so it doesn't hurt to have access to. I finished the pyramid still at level 24, good because I don't want to outpace Reina with these 3. After grabbing the lithograph, the peninsula sinks and Bahamut says he'll be waiting on North Mountain-guess where I'm headed in a bit. Conveniently the airship that was on the peninsula floats to where the Library used to be.


Exdeath cooks a turtle into THE VOID and Reina's body, possessed by Merugene attacks the party. Thankfully, the Hiryuu that brought her there knocks the demon thing out of her, and the battle commenced.


This fight is dumb. I hate this fight. She switches between 4 forms, which are weak to one of fire, ice, lightning and physical, and absorb/resist the other 3. Faris pulled about 10 Sword Dances in roughly 2 dozen dances here-but every single one missed! I was not happy about that, but ironically Tempting Tango was the best Dance to get-since Merugene is vulnerable to confuse. After a 15 minute battle in which I was in no danger due to Golem, Reina rejoins the party.


The lithograph was traded in for the Assassin Dagger, Sasuke's Katana (Hardened Dagger) and Wizard Rod in Kuza Castle, and I also picked up the Chicken Knife from Moore Village. I bypassed its chance to Flee on Fight command...by Dancing with it. The Chicken Knife also gets more powerful with every flee, up to 254 flees/127 attack power. I didn't feel like powering it up just yet though. Also, Exdeath sucked Walse, Istory, Moogle Village and Lix into THE VOID, and Bartz gets really mad that his hometown is now...gone.


Team Sidequest wasn't down with doing unnecessary things just yet-returning to the Pirates Cave resulted in obtaining the Hydra summon. I picked up the Hiryuu from Bal Castle, and went to Mirage Village to spend my stockpiled money. 99 Pinwheels ought to do the trick, as well as 4 pairs of Running Shoes, and the hidden Thief Knife. With Team Sidequest brought up to uber tier, I went to take on Odin.


Odin gives you 1 minute of real time to win the fight. One minute. Faris understood the situation and gave me nothing but Sword Dances, but I made a tactical blunder and relied on Hydra summons for damage.


Odin got to his True Edge attack, which Krile managed to hang on from. Would it be enough time to defeat Odin?
Nope-Hydra summons were just too slow to win. I tried again, this time relying on Pinwheels for damage, and it worked like a charm. I'd like to say there was some crazy strategy going on here, but it was just a straight up damage rush. Of course, if I hadn't had Thief to get Pinwheel funds, I could have just summoned Shoat for a cheap win. Whatever works right?


After picking up Odin, I couldn't figure out where to pick up the Black Chocobo again in World 3, so I just proceeded with the optional dungeons and went to the Island Shrine. Like the pyramid, the entrance was guarded by a set of Gargoyles, who died even easier now that I picked up Hydra. There were a few chests I wanted to pick up here, mainly the Rising Sun-an improvement to the Full Moon from way back on the Fire Ship.
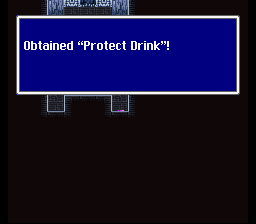

Oh, and that Protect Drink is ridiculously well hidden, I don't know who thought that was a good place to hide a treasure. Anyway, the monster in the box is the Invisible, if I'm correct it's the only one, ever.


At one point it cast Image on itself, I used Odin and Throw to counter that. Its physical attacks could be countered with Golem. The Assassin Dagger has such a sinister attack animation and dealt about 1000 damage here-definitely a nice pickup for almost any playthrough. Reina equipped the Rising Sun, and I engaged Stalker in battle for the second lithograph.


But first, here's how broken my party is. Either hitting for 2000 damage, 4000 damage or an instant kill. If I feel like Throwing, I deal 3000. Nothing can really stand in the way of the might of Team Sidequest!


Except Stalker. He countered my Hydra summon with 3 Flame attacks, and that was that. Great, I actually have to play "find the right one". 15 minutes later, in which Krile and Faris hardly ever hit the right one and only Reina did, and 3 confusion KOs later, he finally went down to Krile hitting twice and Faris hitting with 2 Sword Dances. I found the Black Chocobo in Mirage, and flew off towards North Mountain and Phoenix Tower to grab Bahamut and Phoenix. I fled about 130 battles to unlock the Chicken Knife's full potential, and took it out on Bahamut.


Keep in mind that's not hitting weakness. That's 8000 damage against anything Faris comes across-perhaps I can use Sword Dance to defeat Omega? Anyway, Bahamut was a big joke. Golem+Throw+Hydra+Carbuncle+Sword Dance for 8000=One dead dragon.


Bahamut's power is about even with Hydra's once boosted by an equip (like the Wizard Rod), but Hydra costs a lot less. It's still nice to have access to both however. Team Sidequest is just obliterating World 3, not being challenged by anything and only wiping when some sort of counter attack exists, like Stalker's Blaze. I forsee no difficulty with Phoenix Tower, Fork Tower, Great Sea Trench, Istory Falls or even THE VOID.
No comments:
Post a Comment